First Analysis
This walkthrough takes you from "I just logged in" to "I have a completed analysis with downloadable outputs" using the iFlow web UI. It follows Dr. Jane Doe through one full run in the Intelliseq → Docs project.
If you're scripting against iFlow or building an integration, do the CLI walkthrough instead: Programmatic Access → CLI → First Analysis.
What you'll do
- Register the patient as a Subject.
- Register their biological sample as a Sample under that subject.
- Upload the sample's data file (VCF).
- Launch an analysis pipeline against the sample.
- Watch it run, then open the results.
The whole flow takes a few minutes of clicking plus the pipeline's actual runtime.
Before you start
- You are logged in and you can see Intelliseq as your organization and Docs as your current project in the topbar. If not, see Create Account & 2FA.
- Your project has at least one cloud-storage credential attached (set up by an org admin — see Organizations & Projects).
- You have a VCF, BAM, or FASTQ file ready to upload.
1. Create a subject
Open Subjects from the left nav, then click New Subject in the top right.
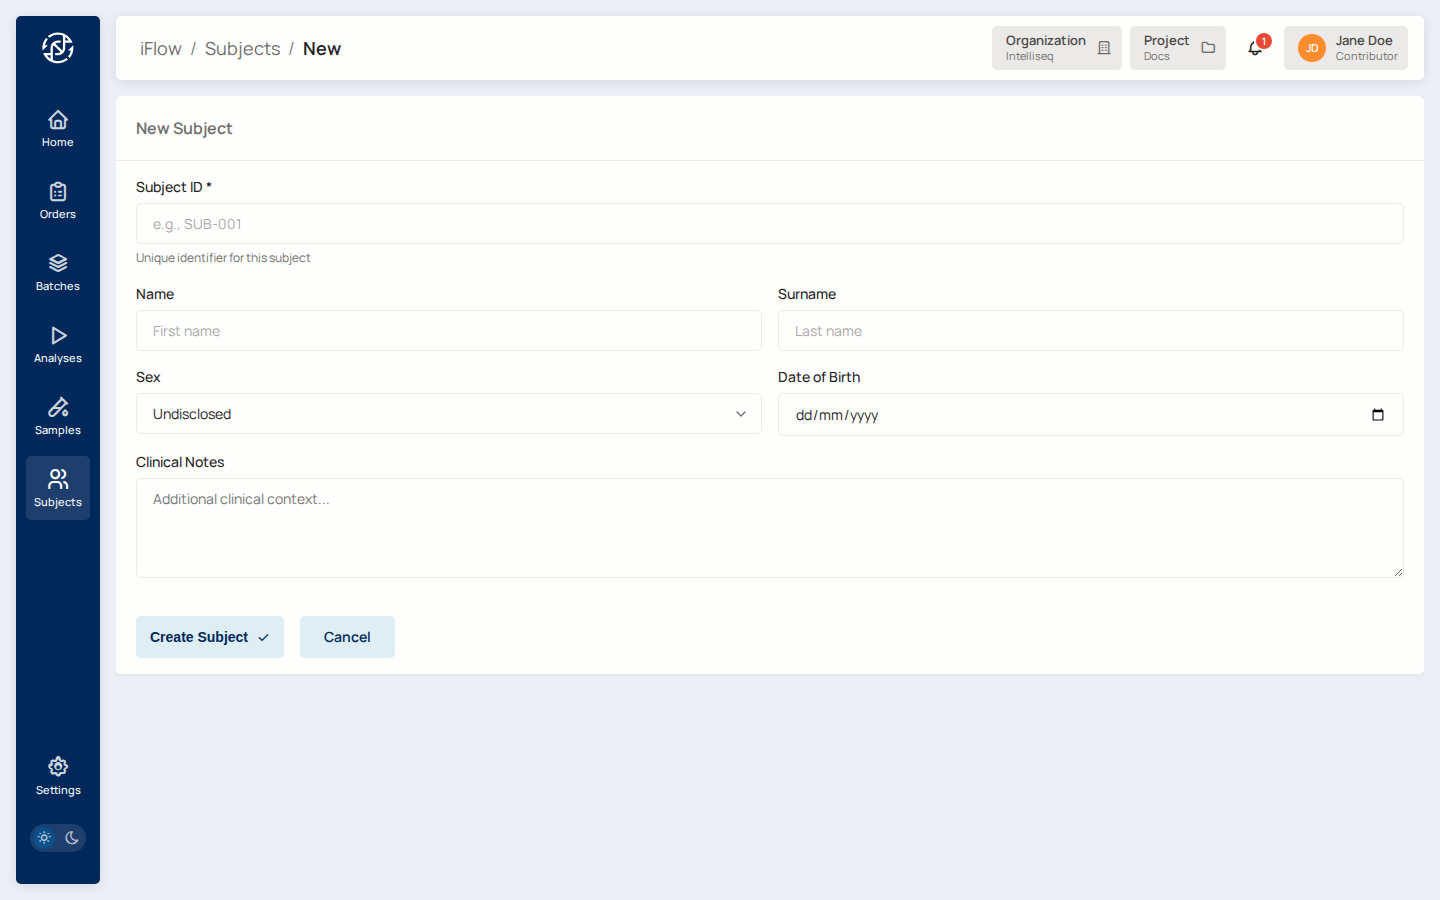
Fill in the Subject ID — a unique identifier within the project (e.g., NA12878-DX). Add any patient-level information you have: name, sex, date of birth, free-text clinical notes. Click Create Subject.
You land back on the Subjects list with the new entry at the top.
2. Create a sample under the subject
Open Samples from the left nav, click New Sample.
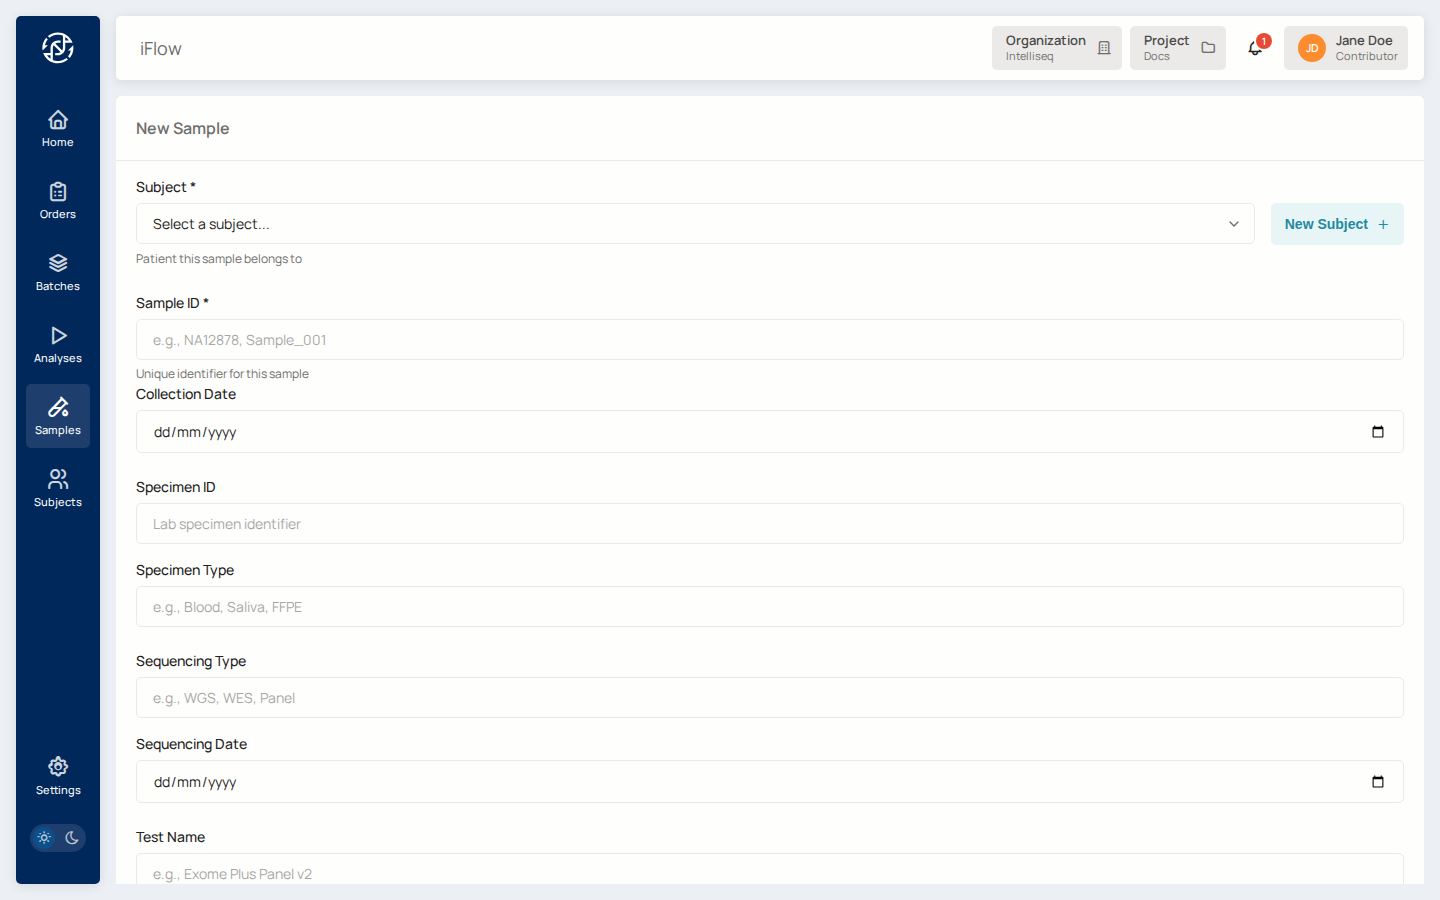
Pick the subject you just created in the Subject field, give the sample its own ID (e.g., NA12878-DX-01), and fill in the metadata that matters for your downstream pipeline (tissue type, library prep, tumor purity, anything required by the reporter you plan to run).
Click Create Sample. The sample now appears under the subject on the subject's detail page.
3. Upload the data file
Open the sample's detail page (from the Samples list, click the sample's ID). In the Sample Files section, drag-and-drop the VCF / BAM / FASTQ, or click Upload and pick the file.
iFlow writes the file to the canonical location: samples/<sample-slug>/uploads/<filename>. You don't have to choose a path. See Project Storage & File Paths for the directory convention.
4. Launch the analysis
Open Analyses from the left nav, click Run Workflow in the top right.
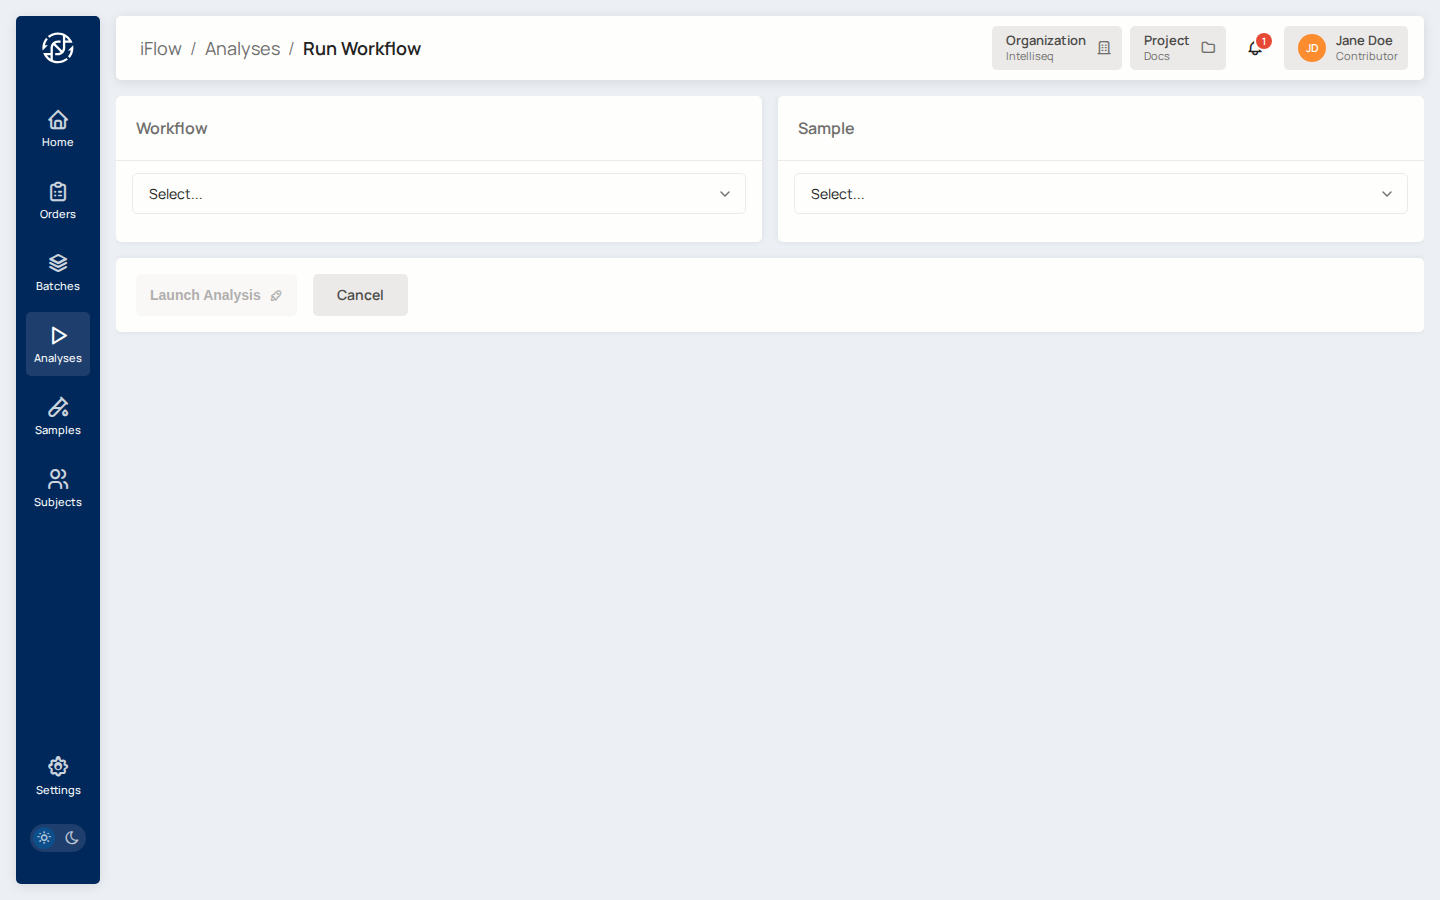
Pick the Workflow you want to run (the dropdown lists every pipeline available in your project — secondary callers, tertiary reporters). Pick the Sample you just registered. Some workflows surface additional parameters once selected — fill those in. Click Launch Analysis.
You land on the new analysis's detail page in queued state.
5. Watch it run
Open Analyses to see your run in the list. The status badge moves through queued → running → completed (or failed). Refresh or use the auto-update — runs typically take minutes to a few hours depending on pipeline and input size.
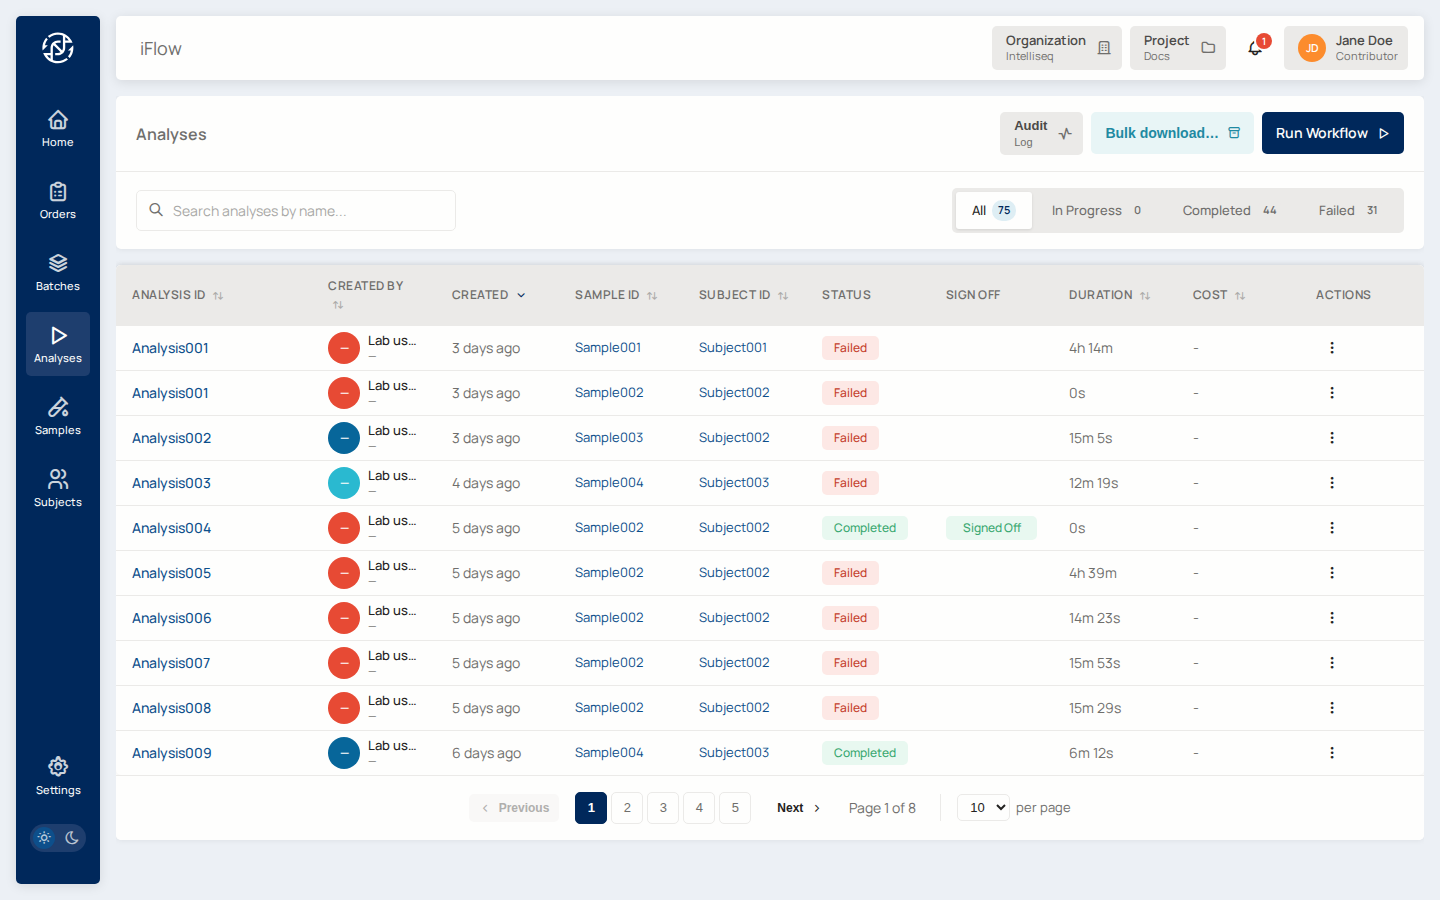
Use the In Progress / Completed / Failed tabs to filter. The Sign Off column highlights analyses whose order has been signed off.
6. View results
When the analysis is Completed, click its name to open the detail page.

You'll see:
- Properties — Workflow, Version, Launched/Completed timestamps, Sample/Subject/Order links.
- Inputs — every parameter the pipeline received, with the file paths used.
- Outputs — every file the pipeline produced. Click any row to download.
For clinical work, jump from here to the linked Order (top right) and follow the order lifecycle through Review and Sign-off.
What to do next
- Order lifecycle — wrap this analysis into a clinical order, review variants, sign off on the report.
- Variant filtering — review the variants the pipeline surfaced.
- Bulk download — pull outputs from many analyses at once.
- CLI walkthrough — the same flow, scripted.
See also
- Intended Use — what iFlow is qualified for.
- Glossary — terminology used throughout the docs.